
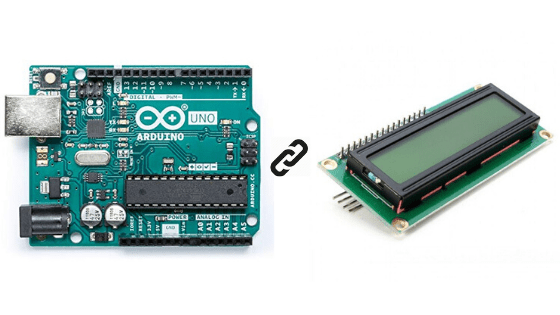
Many projects require a display interface, serving as a valuable tool for visualizing data. Various types of displays cater to different needs, including OLED displays, LCD displays, and e-ink displays. In this tutorial, we’ll focus on learning how to use 16×2 I2C LCD displays, known for their affordability and widespread use in the market.
So without wasting any more time, let’s get started.
16×2 I2C LCD:
The 16×2 LCD earns its name from its configuration of 16 columns and 2 rows, enabling it to display a total of 32 characters. When connecting these displays to a microcontroller, there are two methods: with or without an I2C module. The I2C module facilitates communication with the display using only 2 pins (SDA & SCL).

We will use the I2C display in this tutorial. There are 4 pins on the display namely: GND, VCC, SDA and SCL.
Check out the requirements below.
Disclaimer: This blog contains Amazon Affiliate links. Buying products from those links helps us run this blog without any charges on you.
Requirements:
| Arduino UNO | Arduino Global | Arduino IN | Aliexpress |
| 16×2 I2C LCD | Arduino Global | Arduino IN | Aliexpress |
| Breadboard Kit | Arduino Global | Arduino IN | Aliexpress |
Connections:
Refer to the image for connections.
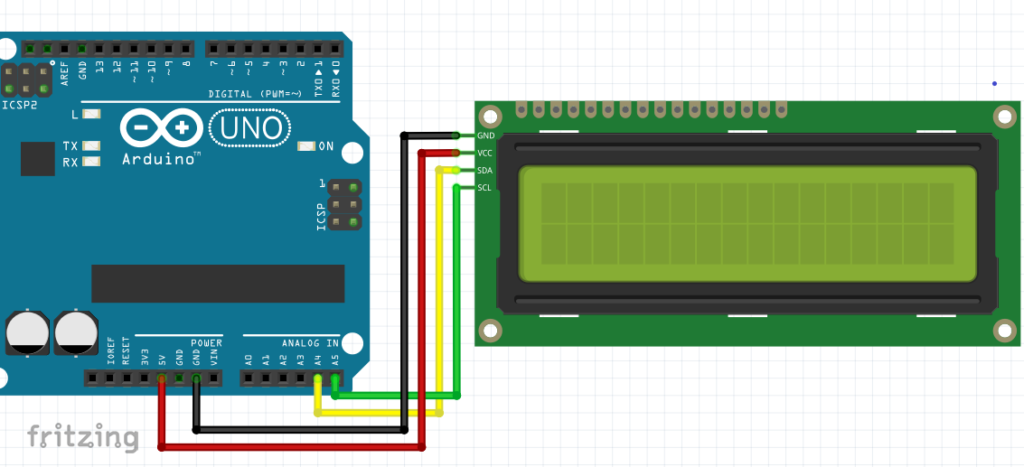
GND = GND
VCC = 5V
SDA = A4
SCL = A5
Codding:
Now instead of writing complicated codes, we can use a library. In this case, we are going to use LiquidCrystal Library by johnrickman
To install the library, download the zip file and extract its contents. Then, copy the file and navigate to Documents >> Arduino >> Library, where you should paste the file. Then, open the Arduino IDE and proceed to write the following code:
#include <LiquidCrystal_I2C.h>

LiquidCrystal_I2C lcd(0x27, 16, 2);

void setup()
 {
  // The begin call takes the width and height. This
  // Should match the number provided to the constructor.
  lcd.begin(16,2);

  lcd.init(); //initializes the display
  lcd.backlight(); // Turn on the backlight.

  lcd.setCursor(5, 0); //Column, Row
  lcd.print("HELLO");// Print HELLO to the screen, starting at 5,0.

  lcd.setCursor(5, 1); //Column, Row
  lcd.print("WORLD"); // Print Word to the screen, starting at 5,1.
}

void loop() {}
Upload the code on Arduino and you should see the text “Hello World” on the display.
Troubleshooting:
If you do not see the text for some reason, here are some steps you should try:
- Recheck the connections, and make sure the I2C pins are connected correctly.
- Power the display with 5V.
- Try changing the I2C address.
If you don’t know the address of your display, use the following code.
#include <Wire.h>

void setup()
{
  Wire.begin();
  Serial.begin(9600);
  while (!Serial);             // Leonardo: wait for serial monitor
  Serial.println("\nI2C Scanner");
}

void loop()
{
  byte error, address;
  int nDevices;

  Serial.println("Scanning...");

  nDevices = 0;
  for(address = 1; address < 127; address++ )
  {
    // The i2c_scanner uses the return value of
    // the Write.endTransmisstion to see if
    // a device did acknowledge to the address.
    Wire.beginTransmission(address);
    error = Wire.endTransmission();

    if (error == 0)
    {
      Serial.print("I2C device found at address 0x");
      if (address<16)
        Serial.print("0");
      Serial.print(address,HEX);
      Serial.println("  !");

      nDevices++;
    }
    else if (error==4)
    {
      Serial.print("Unknown error at address 0x");
      if (address<16)
        Serial.print("0");
      Serial.println(address,HEX);
    }
  }
  if (nDevices == 0)
    Serial.println("No I2C devices found\n");
  else
    Serial.println("done\n");

  delay(5000);           // wait 5 seconds for next scan
}
Upload the code and open Serial Monitor. After a few seconds, the address of the I2C device will be displayed on the screen.
Conclusion:
So now you know how to get a 16×2 LCD Display working with Arduino. You can use a display in many projects as we will see in future. So stay tuned and subscribe if you haven’t already.
If you have questions or doubts, feel free to leave a comment.
If you enjoyed this article, do check out more here.